posted: Tuesday, 30 November 2010
When I took on this locket project I was given free rein to use it in any way I wished.
The brief we were given was "You can put a picture in it, engrave it, paint it, melt it...anything you so desire. The only condition is that the locket is returned to me to be included in a communal locket project".
I thought of many possibilites and rejected many mainly because I didn't want to stop it from being able to perform its function or "destroy" it in any way.
Some of my rejected ideas were: beading all around the locket leaving only the hanging loop, putting it in the middle of one of my beaded stars, adding wirework or polymer clay to make it a solid pendant and encasing it in clear resin to make it a cube.
So, once I had decided to leave it to function as a locket my main areas for decoration were the front and inside panels.
I debated decorating the front and even tried to put some polymer clay into the surafce decoration but it was too shallow.
So that left the inside.
I decided I wanted to use beads, or beadwork, in some way as both of these are precious to me and I felt that tied into the idea of using a locket to hold something precious and meaningful to you.
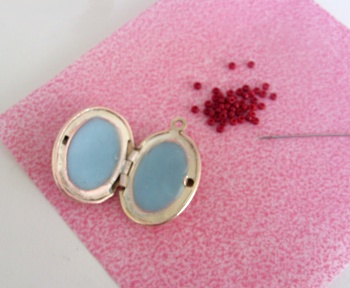
However, my attempts at adding beadwork inside were not successful and so today I decided to go back to one of my original ideas: adding a form of "mosaic" decoration using beads and polymer clay.
After a few experiments outside of the locket it was obvious that the area for decoration was so small that using size 15 seed beads it would be hard to be too intricate. So instead I decided that I would simply use a basic motif which is easily understood and would be seen from afar- a heart.
I used a teal colour of polymer clay partly as I felt it would contrast nicely with the red of the beads, partly because it was a light colour and so shouldn't darken as much as my previous attempts and partly because I was in mourning for my teal that disappeared last night!
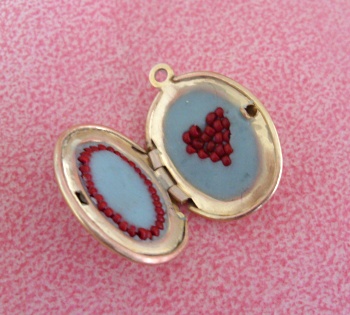
Once the clay was inlaid, I set about adding a simple red heart shape on the right-hand side of the locket and a plain frame pattern on the left.
With great trepidation I put it all in the oven.
A short while later and phew- all had survived.
A bit of sanding and neatening up was all that was left to do before was locket was winging its way to join the rest of the project.
Now back to my knitting- I have to have it done for Friday morning!

